Advanced Swants: The Ziggy Stardust Swumpsuit
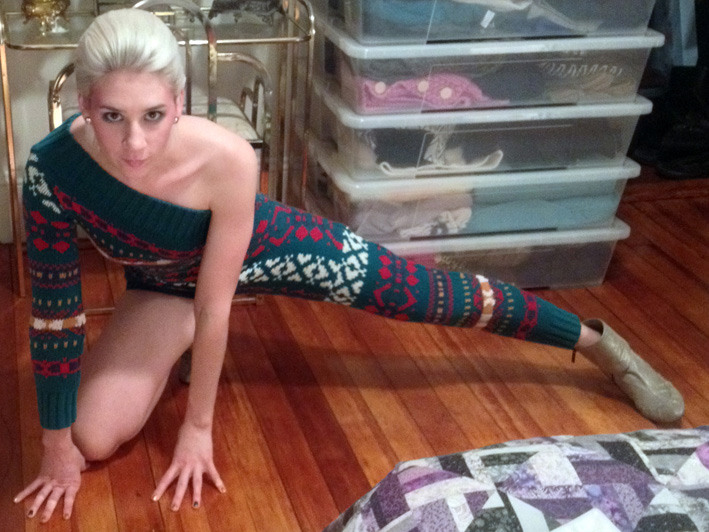
Every year Videodrome Discothèque puts on an amazing all David Bowie themed dance party. Costumes/tribute outfits are definitely encouraged. Last year I went with some of my girlfriends and just wore a rad outfit with some Bowiesque blush and had a great time, but this year I wanted to get more into the costume. I was thinking of reusing my Halloween costume (Jareth from Labrynth) until I google image searched Ziggy Stardust and BOOM. BEHOLD:

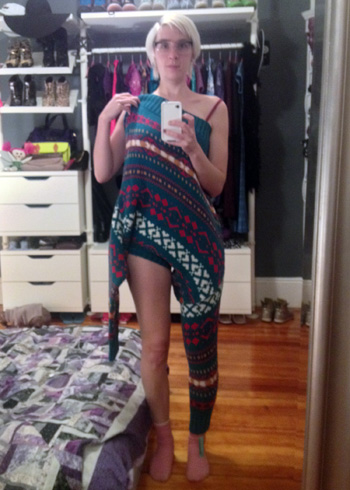
I instantly started thinking back to the swants I made about a month ago and the more I thought about it the more this seemed like the perfect costume project. I just needed a big fair aisle sweater. Here’s how it came out:
To make your own first you need to find a suitable sweater
Requirements:
1. Choose a sweater with a crew neck, it will end up being the leg hole.
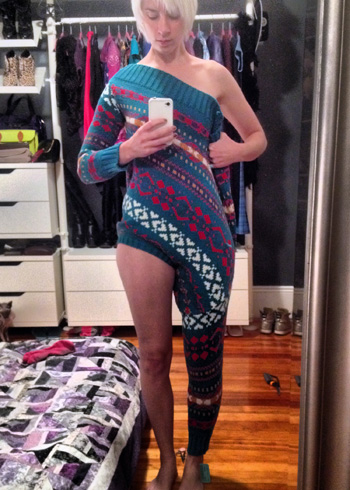
2. A sweater with set-in sleeves will work the best because it will result in a smoother line around the crotch. When you lay it flat on the floor it should look like a “T”. I HIGHLY suggest you try the sweater on (one leg through the neck hole and one leg through an arm) to see how it will look before deciding on one. Look for how the arm will fit one of your legs and how the neck opening fits the other and if the transition between the two lays relatively flat. You should look something like this:
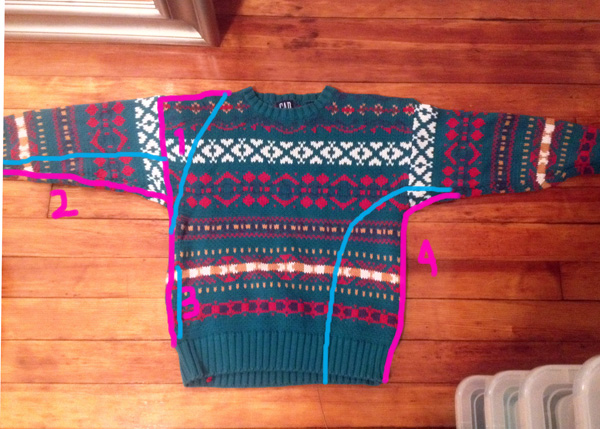
Here’s a picture of the sweater I used. The pink lines show which seams you will be altering the blue lines are more or less where the final seams will be.
After you have your sweater you’ll also need:
1. A tapestry needle
2. Scrap yarn in a similar color to the sweater
3. Some safety pins or stitch markers
4. Optional but highly recommended: a sewing machine.
First you’ll want to remove the second sleeve, the one you are not using as a leg. Be careful to rip out the seam that is already there so you have a solid piece of sweater to work with that wouldn’t unravel from the edges. If you have to cut it free you might want to sew along the edge you’ve cut (steek it) to reinforce the knit. Next you’ll want to take the arm in. Check out this steeking tutorial for help. First, cut along the under-arm seam (don’t worry about being careful on this one because you’ll end up cutting this part off anyway, so hack away). Then drape the sleeve over your arm, pinch the extra fabric and and mark how far you want to take it in to make it fit. Remember to leave extra room at the top of the arm, you’ll need it so you can move your arm once you set the sleeve back into the body of the sweater. Then steek both sides just outside where you want your final underarm seam to be. After steeking you may want to trim the extra fabric before mattress stitching, but I recommend you don’t trim the sweater near the top of the sleeve until you try it on again to make sure you left enough room for a functioning arm hole. Finally, mattress stitch your new underarm seam back together.
Next, take your new sleeve and make an armhole for it that starts just below the bottom band along the same seam you originally removed it from. Again, be careful to just open the seam that was already there (or steek the edge if you just cut it out). Make the hole the same size as the new sleeve. Then mattress stitch the new sleeve into it’s new home.
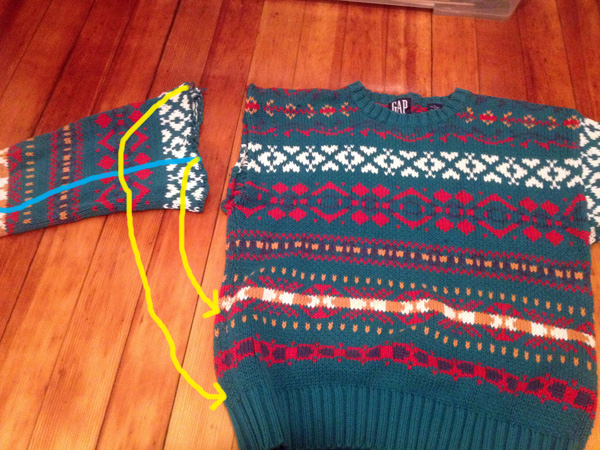
The blue line below is approximately where I made my new underarm seam and the yellow lines show where you are going to reattach the new sleeve to the sweater.
At this point, project Cosby Sweater->Ziggy Stardust is basically in tact, your legs are there, your sleeve is in, try it on and see how it looks!
While you’ve got it on decide how much fabric you’re going to need to take out at the sides. I suggest starting with the longer seam, the one that ends in the sleeveless side of the romper and has a full leg. Pull it to fit, starting at the top (the arm/neck opening) and manipulate the sweater until it is snug enough. Mark where you want to take it in to, use stitch markers or safety pins to mark the stitches you want to end up coming together along the side seam. Then back to the sewing machine for more steeks. Use the marked stitches as a guide and sew two lines down each side connecting the marked stitches. After you finish your steeks cut off the extra fabric and mattress stitch the side back together. The steeks make mattess stitching SO MUCH easier because you have a line to follow while sewing.
Here’s mine, on the left is the sweater when I had taken it off after marking where I wanted to take it in to, you can see the pins and the blue line was where I mattress stitched it back together. On the right is what it looked like after I had steeked it and had cut out the extra fabric on one side:

Try it on again and repeat the same process on the other side seam. I suggest tapering the shorter side seam from near the leg opening to just under the new armpit.
You’re done! It came out AWESOME, right? Congrats on your mastery of advanced swantsing, you should be proud! Thank you Stephen West from West Knits for making this possible! AMAZING.